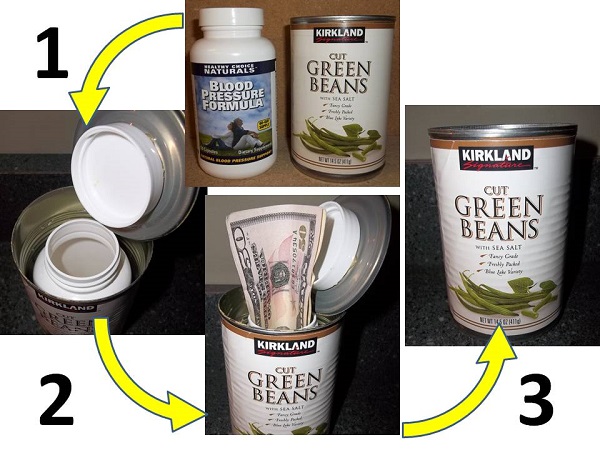
I got this idea of making a diversion safe from a video but instead of using a larger can and mason jar I decided to use a typical vegetable can (green beans) and a pill bottle. The project went rather quickly and turned out pretty good. Here’s how I did it:


- Take any common vegetable can you like and find a plastic pill bottle with a screw on top (which may be the most difficult part) and ensure the pill bottle is at least as tall as the can. Remove the can lid with a SAFETY can opener to ensure you cut the can lid around the edges. If you use a typical can opener this DIY diversion safe won’t work! Wash and dry the inside of the can and lid. If you get the can label wet dry it ASAP.
- Screw the pill bottle cap on snugly and place inside the can. Now rest the can lid atop the pill bottle and measure as closely as you can the gap between the top of the can and the underside of the lip where it will rest on the can. You may want to look place the lid on and off of the can a few times to see where precisely you’re measuring to. In my case I measured 5/8″ exactly but your measurement will likely be different. I then added 1/8″ to make up for the glue as well as to ensure the lid would fit very tightly when all said and done. This measurement wound up to be 3/4″. Remember, your measurement WILL be different.
- Measure the appropriate distance up (3/4″ in my case) from the bottom of the pill bottle, mark it, and cut. Try to get this cut as straight as possible so that the pill bottle lid will screw on easily later.
- Flip the can lid upside down so that the bottom is now facing up. Dab some glue onto the top of the pill bottle cap and center it on the can lid. I was going to clamp it but decided not to and it worked fine using Gorilla glue.
- Repeat the process to glue the top portion of the pill bottle to the inside bottom of the can. Be sure to center the pill bottle in the can so everything lines up. The best plan here would be to just squirt a liberal amount of glue into the bottom of the vegetable can and then sit the pill bottle inside.
- After a few hours–or however long it takes for your glue to dry–you’ll have yourself a nifty diversion safe.
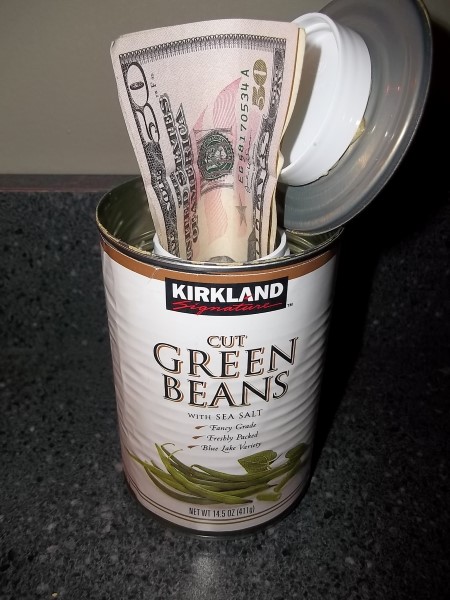
- Place whatever you like inside but realize that things will rattle so if you’re going to place items like jewelry, for instance, inside then you may want to cushion it. Granted, this diversion safe will likely NOT pass muster if picked up due to an obvious weight difference between this can and normal cans of green beans. There’s also something to be said for this diversion safe not having any liquid inside and so that would be different too.
- When finished loading the diversion safe with your goodies screw on the can lid and ensure the lip is seated all the way around as the lid can warp. Glance over this “can safe” and you won’t notice any differences but upon close inspection when compared to other cans you may notice a difference in the top can lip but you REALLY have to be looking for it to notice.
- Removing the can lid was more difficult that I expected. At least, I wasn’t able to do so with my bare hands when the lid was on snugly. Even using rags wasn’t helping. I resorted to using a pair of chemical gloves with very grippy fingers! Keep this in mind.
Now, one last test. Which one is the diversion safe? Bet you can’t guess!
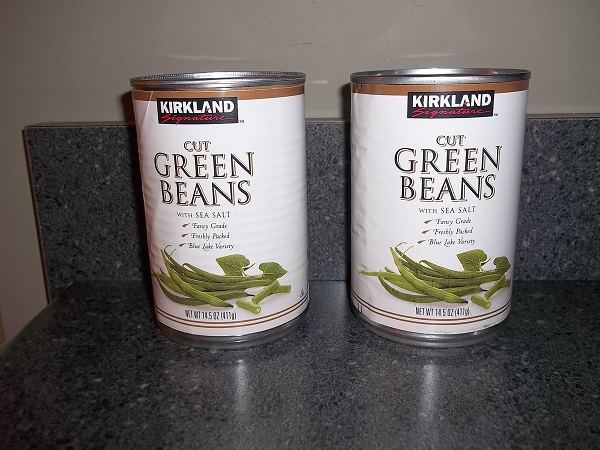
So, which one did you choose? If you choose on the left, you’re correct. In my opinion, the only thing that may give it away in the photo above is that the can on the left has the label more wrinkled than the other one. What say you?
Leave a Reply