As a prepper, being ready for anything means more than just stockpiling supplies and gear. It also means fueling your body to stay strong, sharp and healthy no matter what challenges arise.
A well-stocked food supply is crucial for riding out any disaster, whether it’s a grid-down, disease outbreak, martial law or economic collapse. But it’s not just about quantity — the quality and makeup of your diet is equally important.
After all, you could have a 10-year supply of ramen noodles and Twinkies, but that diet is a recipe for vitamin deficiencies, digestive issues, brain fog and a weakened immune system. Not exactly what you want when facing survival challenges.
The key is planning a prepper diet that covers all your essential nutrients, incorporates the right food groups in the right proportions and is practical for your situation in terms of shelf-stability, storage space and gardening and livestock capabilities.
So, how do you plan for the optimal diet as a prepper?
Step 1: Stock Up on Nutrient-Dense Staples
First things first, you need to fill your prepper pantry with foods that pack a serious nutritional punch. These should be foods high in calories and essential nutrients and easy to store long-term. Here are some of the best options:
- Rice and other grains: Oats, quinoa, millet, rice — these babies are your new best friends. They’re cheap, filling and loaded with complex carbs to keep you energized. Plus, they last forever when stored properly. Look for whole-grain options whenever possible, as they retain more nutrients than their processed counterparts.
- Beans and legumes: Beans are like the superheroes of the prepper world. They have loads of protein, fiber and essential vitamins and minerals. They also have enough carbs to energize you throughout the day and can last years in your pantry.
- Canned meats and fish: While fresh meat might be off the table in a long-term survival situation, canned meats and fish are a great way to get essential protein and stay full. Stock up on canned chicken, tuna, salmon and other options that are high in protein and omega-3s.
- Nuts and seeds: Nuts and seeds are nutrient powerhouses, perfect for preppers. They’re high in healthy fats, protein and essential micronutrients like vitamin E, magnesium and selenium. Plus, they’re calorie-dense, so a little goes a long way. Just be sure to store them properly in airtight containers to prevent rancidity.
- Dehydrated and freeze-dried fruits and vegetables: Fresh produce might be hard to come by, but that doesn’t mean you have to skimp on the good stuff. Dehydrated and freeze-dried fruits and veggies can last years and still provide all the necessary vitamins and minerals. You can also store powdered veggies, which you can add to soups or salads for extra nutrition.
Step 2: Stock Up Essential Cooking Ingredients
While your pantry staples will form the backbone of your prepper meals, don’t forget the essential cooking ingredients that will help you turn those basics into delicious, satisfying dishes. Here are some must-haves:
- Salt: Salt is essential for seasoning and preserving your food. Stock up on both iodized and non-iodized salt. You can also include sea salt and pink Himalayan salt.
- Oils and fats: Healthy fats are crucial for keeping you full, satisfied and energized. Stock up on shelf-stable oils like olive oil and coconut oil. Learn to make lard, butter and ghee or purchase them from a community market.
- Spices and seasonings: Eating the same bland meals day after day can kill morale in survival situations. Dried and ground spices are extremely shelf-stable and add flavor to all dishes. Some essentials include garlic powder, onion powder, black pepper, curry powder, cumin, chili powder and dried herbs.
- Baking essentials: If you are ever in a survival situation without basic baking supplies, you’ll miss bread and all other baked goods. Include baking powder, baking soda, yeast and powdered milk in your prepper pantry.
- Sweeteners: Shelf-stable sweeteners make all the difference. You can keep low-calorie options like stevia and monk fruit. Honey is the most optimal choice as it can withstand high heat and preserve food.
Step 3: Get Fresh Food Whenever Possible
As a prepper, you know that shelf-table foods are your best friends. However, it’s still important to incorporate fresh foods whenever possible. You can do this by:
- Starting a garden: Growing your own fruits, veggies and herbs is one of the best ways to ensure a steady supply of fresh produce. Focus on nutrient-dense, calorie-dense crops like sweet potatoes, winter squash, kale and berries.
- Raising chickens for eggs: If you have the space and resources, raising chickens for eggs is a fantastic way to add fresh protein to your diet. Choose hardy, productive breeds like Rhode Island Reds or Orpingtons.
- Forage for wild edibles: Learning to identify and harvest wild edible plants can greatly expand your food options in a survival situation. Dandelion greens, purslane and wild berries are some examples of nutritious, readily available wild foods.
- Make sprouts or microgreens: Grow your own sprouts with seeds, water and ajar or tray. Try options like broccoli, radish, sunflower or alfalfa sprouts. Sprouts and microgreens are nutrient powerhouses, loaded with enzymes, vitamins and minerals in their most bioavailable form.
Step 4: Embrace Nose-to-Tail Eating
In a survival situation, you can’t afford to be picky about what parts of an animal you eat. Embracing nose-to-tail eating is an excellent way to make the most of your food supply and get a wide range of nutrients. Organ meats, bones, skin and connective tissue provide hard-to-get nutrients that keep your body thriving.
Some ideas for nose-to-tail eating:
- Make bone broth from leftover carcasses to extract collagen, gelatin and minerals
- Render fat from pork, beef or duck to use for cooking
- Eat liver pate or mix ground liver into meatballs and burgers
- Slow-cook tough cuts like shanks, oxtails and cheeks until tender
- Make headcheese from pig’s head or scrapple from organ meat scraps
- Use animal skins to make cracklins or chew sticks
- Stuff sausages with organ meats and spices
Step 5: Focus on Breakfast
Listen up — skipping breakfast is a big no-no is a survival situation. You may not need or afford three meals a day during a breakdown of society, but your priority must be breakfast.
Fueling correctly for the day ahead will ensure you have the energy to tackle the unknown. If you get to wake up for a new day during a survival situation, you must fuel for it thoroughly and then use the other meals to supplement nutrition and get extra energy throughout the day. A filling breakfast sets you up to have an optimal, energetic day.
Studies have shown that skipping breakfast is connected to decreased cognitive performance — alertness, attention, memory, processing of complex visual displays and problem-solving — among students. It may also affect your brain function as an adult, hindering your decision-making capabilities in an already stressful and uncertain situation.
Focus on getting complex carbs, healthy fats and lots of protein in your first meal. You can have overnight oats with seeds and some eggs, a whole-grain bread sandwich with canned meat, mushrooms and lettuce or sweet potatoes, fried meat and veggies.
Step 6: Master Food Storage and Preservation Techniques
To make the most of your homegrown produce, learn how to preserve and store it properly. Proper preservation will allow you to enjoy nutrient-dense fruits and vegetables year-round, even when fresh options are scarce. Some techniques to master include:
- Use airtight containers: Store dry goods like grains, beans and sugar in airtight containers like mason jars or food-grade buckets with tight-fitting lids. These containers will help keep out moisture, pests and oxygen, which can cause food to spoil faster.
- Invest in a vacuum sealer: A vacuum sealer is a game-changer for extending the shelf life of your food. Use it to seal dry goods and package portions of dried meats and fruits for easy grab-and-go meals.
- Learn to can and dehydrate: Dehydrating and canning are two fantastic ways to preserve fresh foods for long-term storage. Water bath canning is excellent for high-acid foods like pickles and fruits. Pressure canning is necessary for low-acid foods like meats and vegetables. Dehydrating works well for fruits, veggies and meat jerky.
- Master fermentation: Fermented foods are crucial for overall health. They provide your gut with essential probiotics and add flavor to boring meals. Try fermenting cabbage to sauerkraut or kimchi. Learn how to make cheese, kefir and yogurt from milk. Master your kombucha-making and sour-dough starter process.
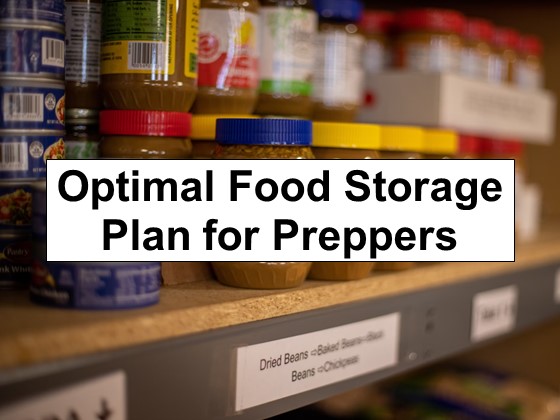
Step 7: Have a Rotation System in Place
It’s essential to have a rotation system in place to ensure you’re always eating the freshest food possible. Cycle through your food supply regularly, using up older items first and replacing them with new stock.
Label all your food containers clearly with the contents and the date you packaged them. Clear labeling will help you track what you need to use up first. Keep a detailed inventory of your food supply to help you keep tabs on what you have, what you need and what you must use soon. Keep a written list, as a spreadsheet will be inaccessible in a survival situation.
Step 8: Plan for Hydration
While food is important, always remember the importance of staying hydrated. Make sure your prepper pantry includes various beverage options.
Always have fresh, clean water. Aim to store at least one gallon per person per day. Consider investing in a water filtration system as a backup and learn how to filter water yourself. If you can, purchase land near an all-weather water source, ideally fresh.
Stock up on other hydrating beverages, such as coconut water, sports drinks and shelf-stable milk. Watch the sugar content and prioritize options with added electrolytes.
While not strictly necessary, having some tea and coffee on hand can provide a much-needed sense of comfort and normalcy. Caffeine can also give you a nice energy boost when needed.
Step 9: Remember Nutritional Needs
While a well-rounded prepper pantry should provide most of your nutritional needs, shelf-stable supplemental items could boost your essential nutrients, especially in times of food scarcity or shortage.
Have a stash of protein bars and different protein powders. Look for high-quality complete protein powder like whey, casein or a plant-based blend. Ensure the protein bars are actually high in protein by comparing the total protein to the bar’s weight.
Stock up on long-expiry essential supplements. A high-quality multivitamin can fill nutritional gaps and ensure you get a broad range of important vitamins and minerals. You should also stock up on vitamin C, vitamin D and omega-3s as these are the most common nutrient deficiencies.
Step 10: Practice Makes Perfect
Do you want to know the best way to ensure your prepper diet will actually work for you in a crisis? Practice using it now! Regularly incorporate your prepper foods into your regular meal rotation and experiment with different recipes and preparation methods.
Practicing now will help you identify any gaps or issues with your food supply, get used to cooking with shelf-stable ingredients, figure out what meals and flavors you enjoy most and rotate your food supply to keep things fresh.
The Bottom Line
Creating the ultimate prepper diet takes some planning and effort, but it’s so worth it for the peace of mind and security it provides. Your food supply is your lifeline in an emergency. Building a well-rounded, nourishing prepper pantry is one of the best investments you can make.
Leave a Reply