
I’ve had a Global Sun Oven for years now and really enjoyed using it but, sadly, haven’t done so in about a year. (FYI: There’s a newer version, the All American Sun Oven, that seems to be a better design and less expensive if interested.) Anyway, while visiting my in-laws I noticed they’ve yet to unbox their sun oven–which they’ve also had for years–and so I figured I would get it ready for them, use it once or twice, and show you how easy it is to do, well, almost…
Step 1: Grab a beer and remove the plastic film from reflectors
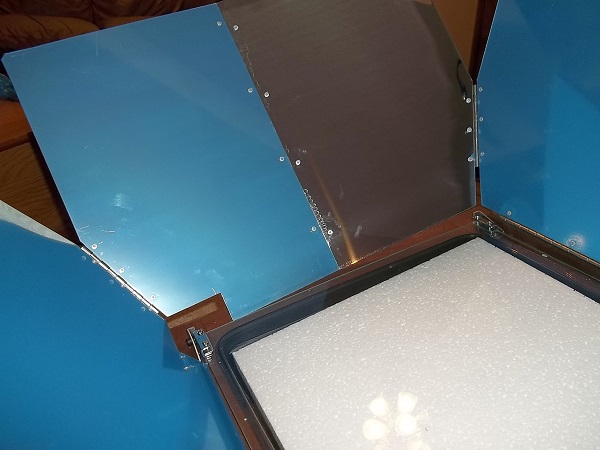
This is without a doubt the most difficult part of the process. In fact, I remember complaining about this very step when I unboxed my sun oven the first time years ago because the film is VERY difficult to remove. I think I spent a good 20 minutes getting it off because it is so well adhered. Hopefully they have a better design these days.
Obviously, this is good to protect the reflectors from being damaged but it is super frustrating for those of us who are impatient, me included. I’ve found the easiest way to get it off is to start from the bottom (closest to the glass) and work your way up around each rivet and ending toward the flanges.
Step 2: Adjust the retention screws, finish beer
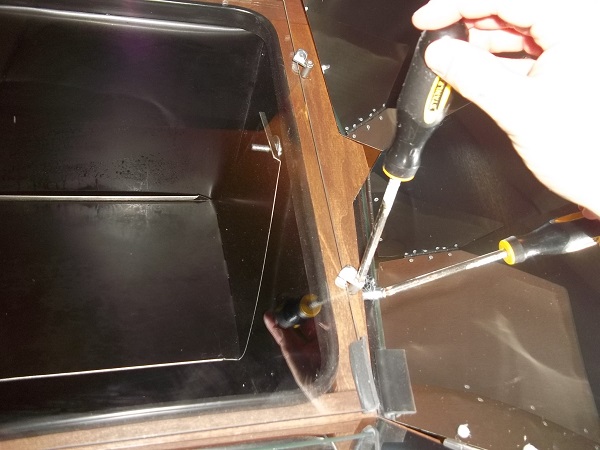
There are two adjustable screws that are used to hold the glass in place when cooking food. From the factory they were set too tight and needed to be loosened a bit. Ensure they’re tight enough to still compress the gasket just a bit when the glass is closed but NOT too tight they they’re difficult to turn when the glass is closed. You’ll get the idea when you try it.
Step 3: Grab another beer and set out the sun oven with a pot of water inside
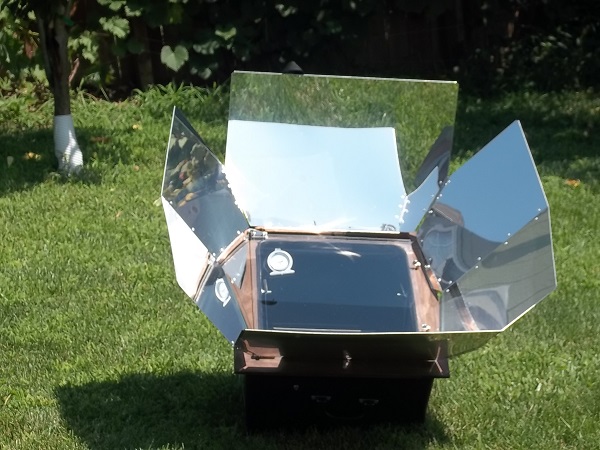
If you’ve yet to do so remove the styrofoam and literate from the inside of the oven chamber, setup the sun oven (as if you were cooking) out in the sun with an pot of water and a few drops of dish soap and let it sit there for a good two hours, checking that it’s still properly aligned with the sun every 20-30 minutes. This helps ensure the insides are thoroughly cleaned. Alternatively, I’d imagine you could just scrub it really good with your favorite cleaner.
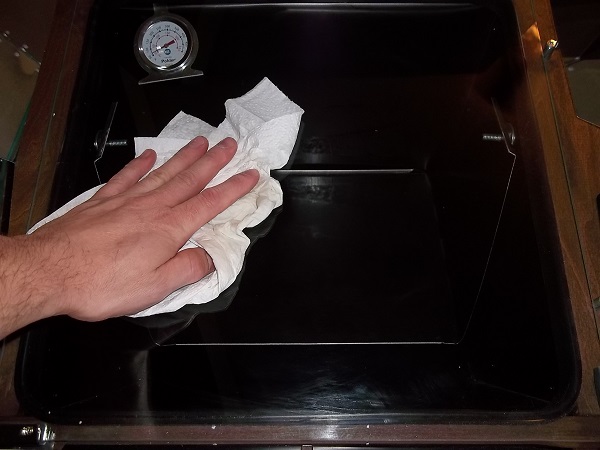
Step 4: Give the glass and insides a good cleaning, finish beer
By now you should have a good buzz going. 😉 Here’s how to finish setup…
Remove the pot of water, bring the oven inside, let it cool a bit, then give the glass a good scrubbing inside and out and wipe down the inside of the stove chamber and, if you’re feeling really thorough, clean the rubber gasket that presses against the glass.
Note: there’s no reason to clean the reflectors as they were protected by the blue film unless you happened to get a whole bunch of fingermarks on the reflectors while removing the film.
That’s it. You’re officially done and ready to cook! If you’ve yet to purchase a Global Sun Oven or, better yet, the All American Sun Oven now’s the time to grab yourself one as it’s one of the best ways to cook food off-grid or during a SHTF scenario.
Leave a Reply