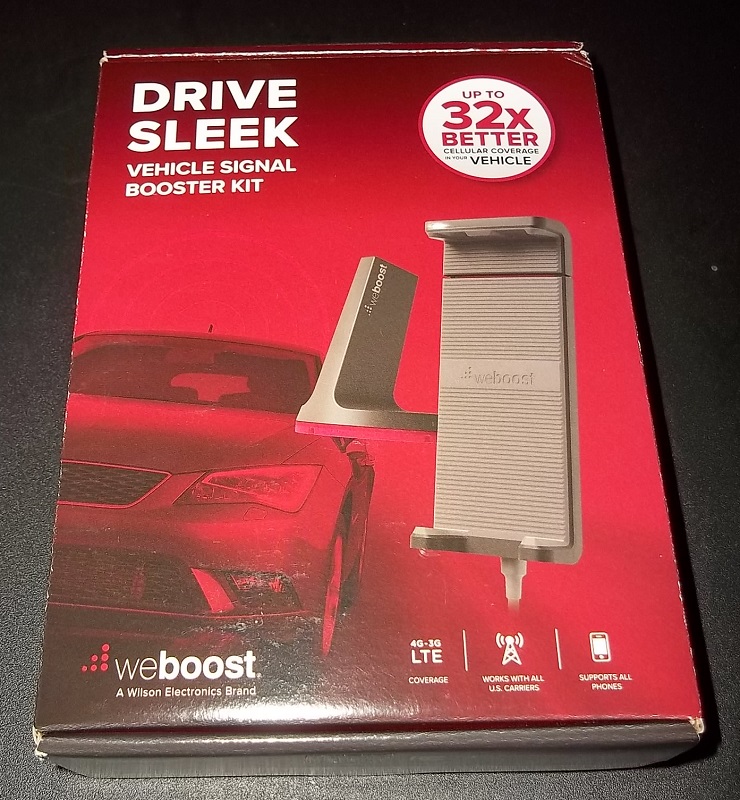
A few months ago I was sent this Drive Sleek Vehicle Signal Booster Kit in exchange for an honest review, and I can honestly say that I’m glad they reached out to me:
To be honest, I had no idea these even existed until the folks at Weboost.com sent me one. I’d always assumed you got whatever cell phone signal you got and that was it! Well, that’s not true at all. In fact, you can do a lot better than you realize with a signal booster such as this. I’ll explain in a moment.
Anyway, I was pretty excited when it arrived, but that excitement waned quickly because I realized there was some effort involved with installation:
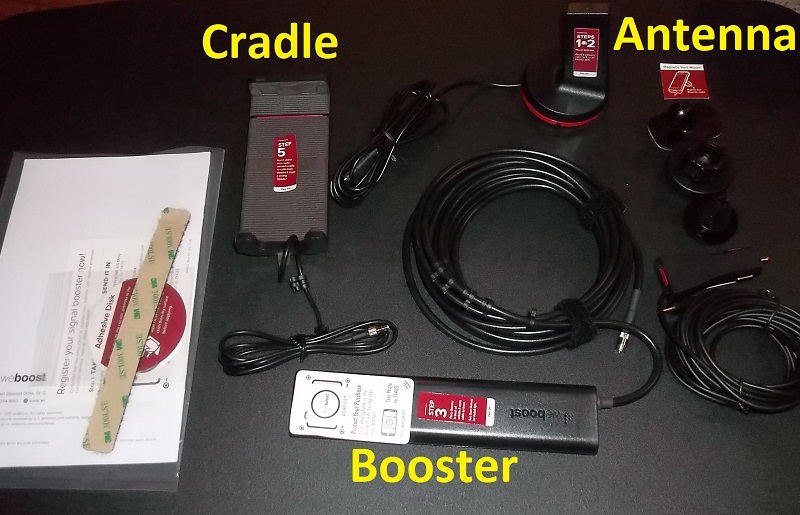
As you can see from the above photo there are a few things to install, including running wiring and mounting things. Really, I thought it was something I just plugged into my auxiliary plug and it was ready to go. As such, I put everything back in the box and sat on it for a few weeks.
That was a mistake because, after I finally made the time to do this, it took me about ten minutes of my time (maybe less) to get it all installed. Really, the install was no big deal whatsoever.
Here’s what to do…
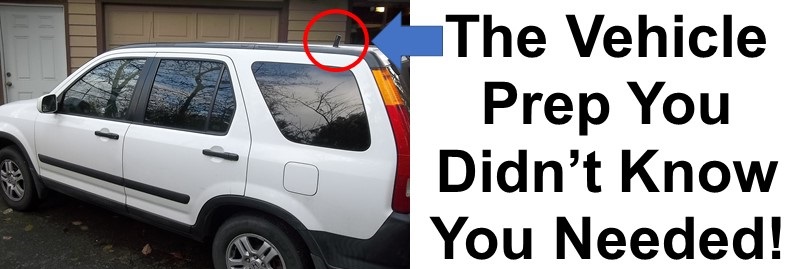
First, mount the antenna to the roof of your vehicle:
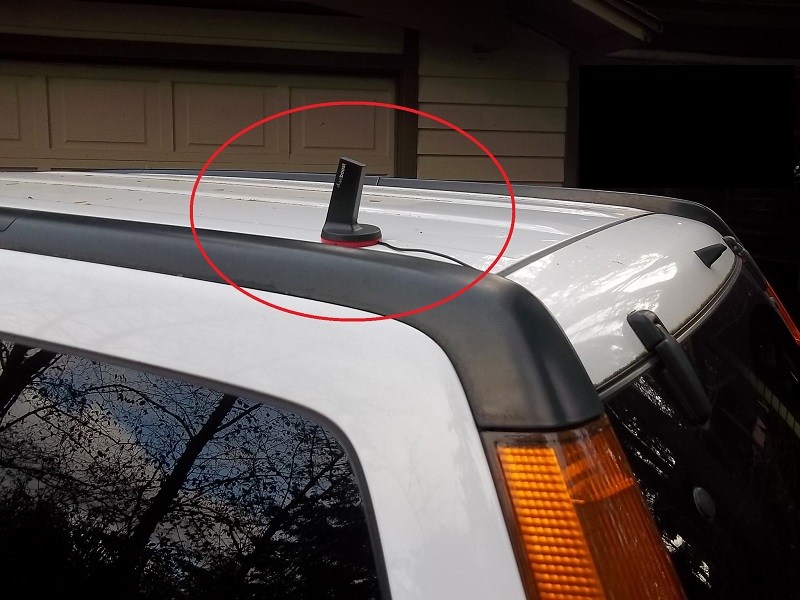
That’s really easy to do because it’s secured with a magnetic mount and then you just run a single wire into the cabin of the vehicle. Because I have an SUV it was easy enough to run the wire through the backdoor and along the weatherstripping. The only stipulation, they say, is to keep the antenna at least six inches away from glass. Again, no problem.
If you have a passenger car then you run it through any door you like and do the same thing I did. Just be careful to not pinch the weatherstripping such that it might allow water into the passenger compartment.
The next step was to plug in the antenna and get power to the booster:
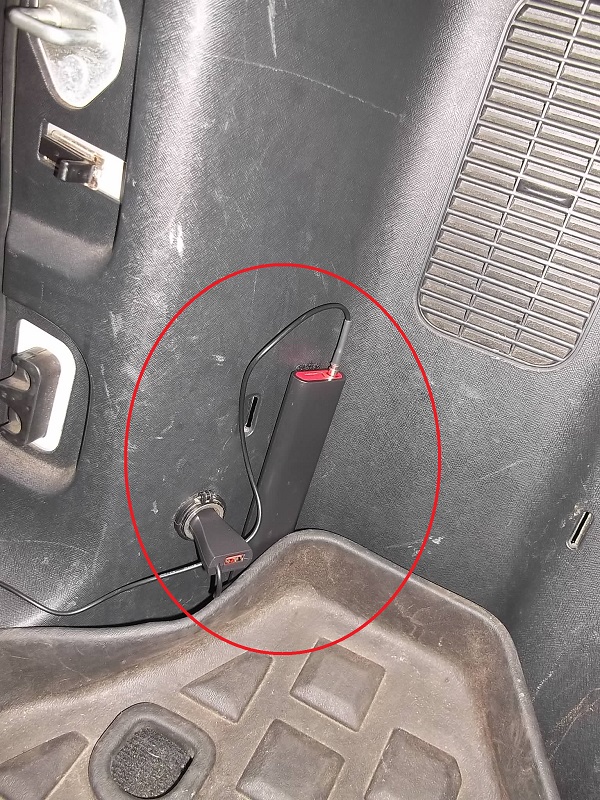
This was all easily accomplished in the rear of my vehicle because I had an auxiliary plug in the back, but it’s just about as easy to run some wiring (they give you plenty) to the front of the car, if need be, to plug into the auxiliary plug on the dash.
FYI, the booster came with some heavy-duty Velcro to adhere it to a panel like I did in the photo above, but you probably don’t even need to do that so long as the wires aren’t getting pinched and connections aren’t getting bumped.
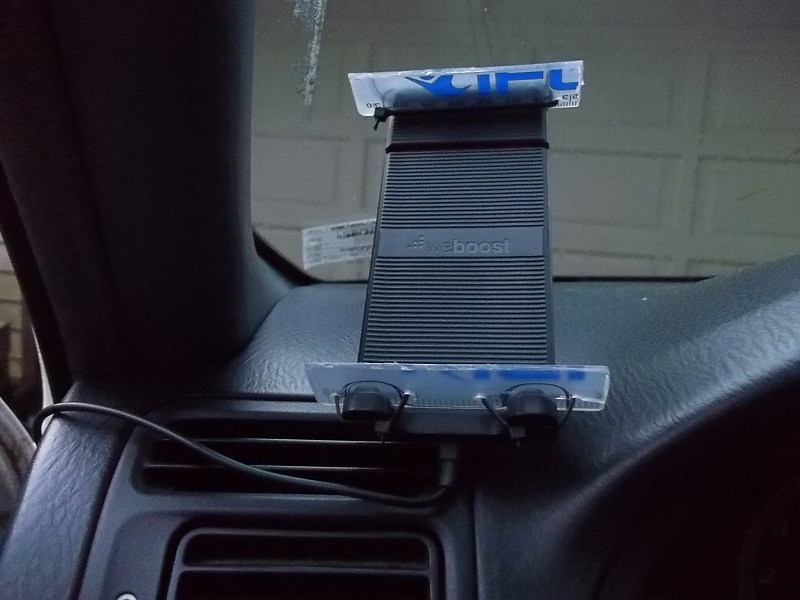
Once you have the antenna and power connected to the booster, the final step is to run wiring to the phone cradle itself:
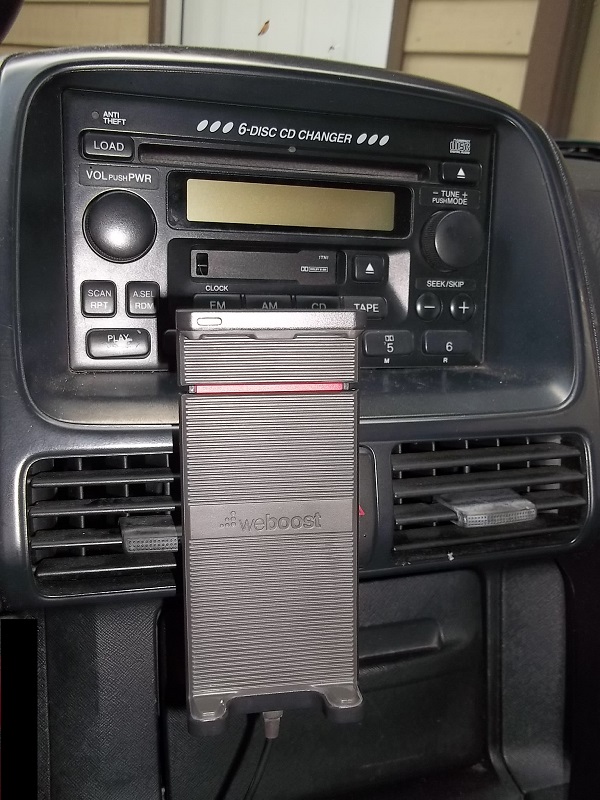
Now, this could be a bit of an ordeal if you’re worried about running the wire behind trim panels and under carpeting, but it’s really not. And, as you might tell from the photo above, I have the cradle secured to the air vent with a handy mounting accessory they included for this very purpose.
Now, setup is complete. Really, it took me all of ten minutes at most to do this. But, I ran into a problem…
You see, a normal phone fits just fine and is quite secure in the cradle (this was my kid’s phone):
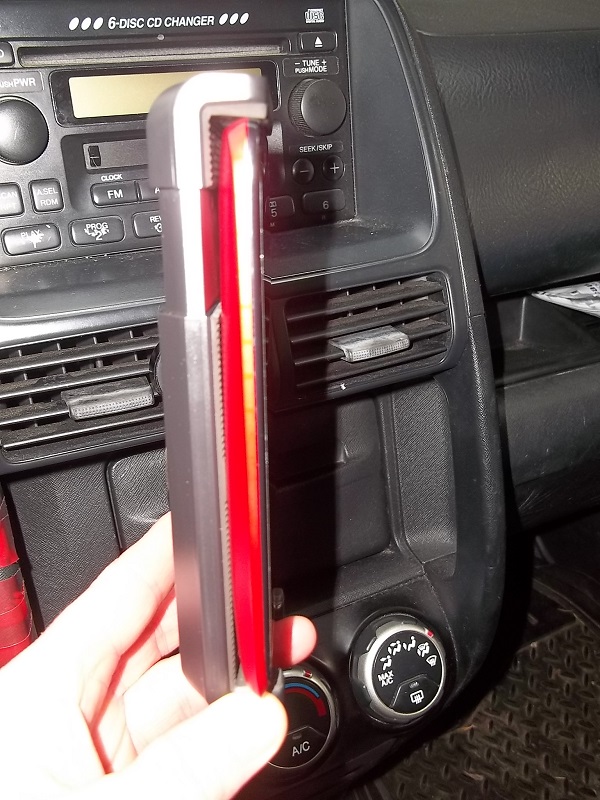
But my phone has an extended (bigger) battery which makes it deeper and, therefore, NOT fit securely at all:
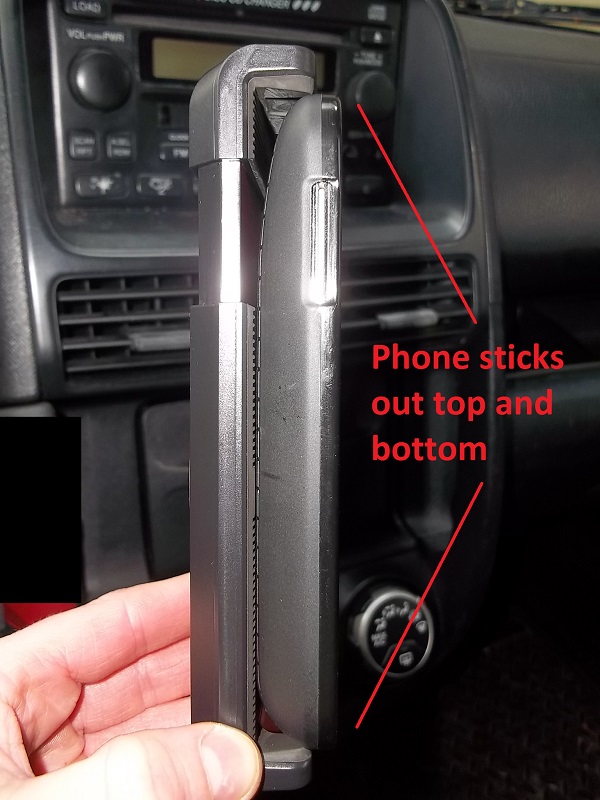
…and this was a problem for me because the slightest bump would make the phone fall out of the cradle. But, I rigged a solution with an old plastic ruler and some zip ties like so:
Yeah, it’s not pretty but it’s been working just fine. And my phone fits well now:
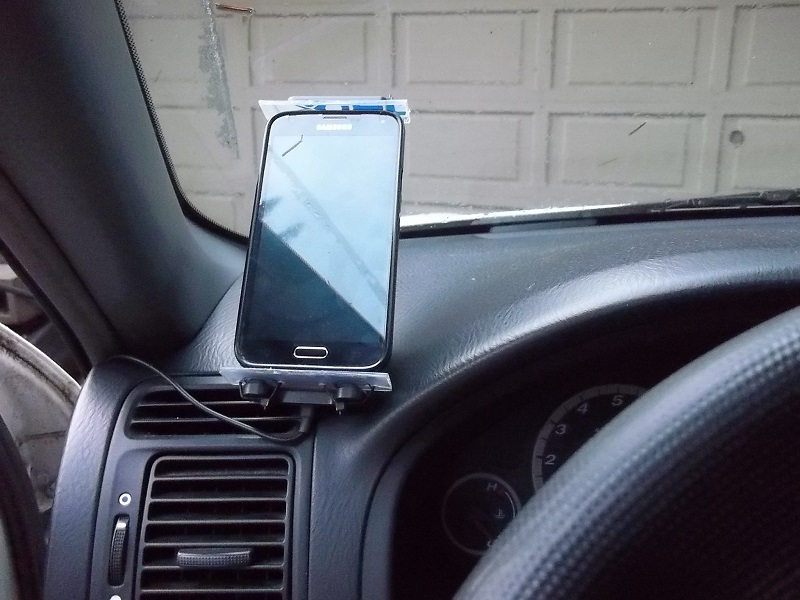
As you can see from the photo above, the cradle isn’t attached to an air vent but, rather, to the dashboard using a different mounting solution which I prefer.
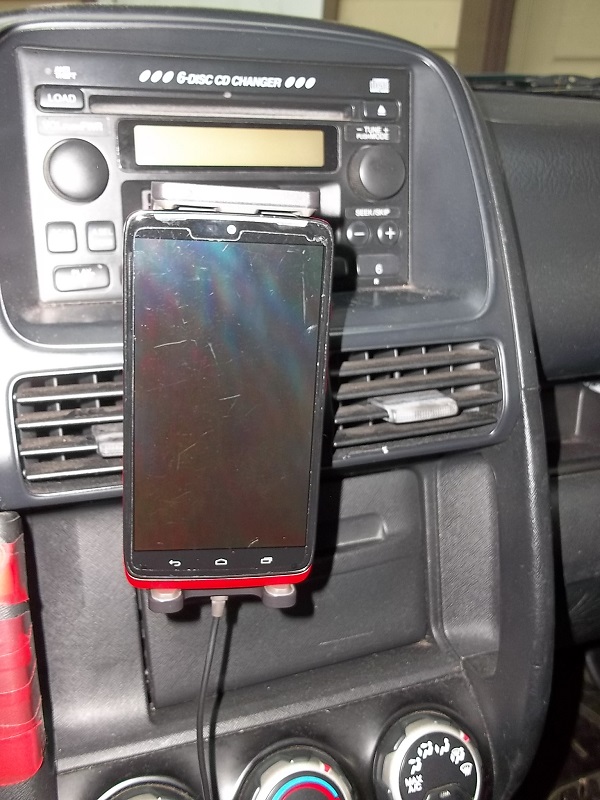
But, if you like the air vent option, it works fine too; however, it just doesn’t feel quite as sturdy in my vehicle… mostly because my air vents are old and don’t like to stay in position anymore:
Before you can use the signal booster, the manual–yes, I read one for a change–said I needed to register the signal booster with my cell phone carrier which was surprising to me, yet easy to do since they gave me instructions on how to do it. (Note: We have Verizon but they included the appropriate URL for AT&T and others.) Again, that took me only a few minutes to finish.
Once registered, the booster is ready to be used.
So, I did. And after months of use I can say three things…
Here’s What I Know:
- The signal booster does boost a weak signal to make it stronger;
- The signal booster doesn’t actually boost a strong signal to make it stronger;
- The signal booster can’t boost a nonexistent signal.
Let me explain…
Since we live in the Pacific Northwest, we went with Verizon because they tended to get the best service here. And, for the most part, we have no complaints about our phone signals unless, of course, we venture deep into the woods or the Olympic peninsula where we don’t expect much of a signal. Around town where we live, everything is great.
That said, we don’t always get four or five bars of signal strength. Often two or three is what we get for whatever reason. I’d assumed, wrongly, that the signal booster would take that two or three bars I often get and magically turn it into five bars. It doesn’t. And I don’t quite understand why. No big deal, a few bars of 4G is fine.
What I have noticed is that the signal booster does make is so that those times where I’d normally get maybe a single bar of service or, worse 3G service, that this never happens anymore.
For example, my wife and I went to a spot where we knew we didn’t get a decent signal and after about an hour of driving around and testing, it was clear that the signal booster helped a lot. Whereas my wife’s phone would often have only a single bar of service, switched to 3G regularly, and even had the dreaded “1X” signal indication, my phone (in the cradle) never lost 4G service or dropped below two or three bars of service.
What the signal booster can’t do is boost a nonexistent signal. And though I’ve yet to put myself into a situation where I can test the limits, I plan on going deep into the Olympics this spring to places where I know our phones get no signal at all and see what the signal booster can do. I just haven’t made the time to do so yet.
Why A Signal Booster Is Useful
Anyway, why is this important? After all, if you’re getting at least some signal, isn’t that good enough? Well, sure, if things are normal… but not if your survival depends on it!
For instance, it could be that the nearest cell tower has been damaged, or that you’re in a spot where the signal is spotty anyway, or it could be that everyone else is trying to use their phones too which means your call or text may not go through… all of which is bad for you.
But, if you have a signal booster, that crucial call or text you’re trying to send when disaster strikes could very well get through!
Maybe the closest cell tower is down but the booster can reach out to the next nearest tower when your phone wouldn’t have been able to do so without it.
Or maybe signal is spotty because of a disaster and the signal booster ensures you never lose your connection. (And who’s to say if you’ll ever get through again.)
Or, because the signal booster makes your signal stronger, you’re then more likely to connect your call than other people which means your crucial call gets through when their’s wouldn’t.
Whatever the reason, I can see now how truly useful this Drive Sleek Vehicle Signal Booster Kit really is for disaster preparedness, and I hope you do as well.
Stay safe out there!
Leave a Reply