I usually enjoy making homemade bread, at least, when things work out properly. When they don’t–mostly because the bread didn’t rise as expected–I tend to despise the process just a little. Yes, I have a bit of a love/hate relationship with making bread.
In my opinion, homemade bread making is part science and part art… maybe a little luck too. Fortunately, I’ve had some practice at getting it right and will share my whole wheat bread recipe with you here, today.
Needless to say, there are many DIY whole wheat bread recipes out there but we prefer this one because it uses very few ingredients (only four if you ignore the water and yeast) and for the most part makes a very good sandwich bread.
I should note that the following recipe is out of a very old cookbook which may well be older than I am. 😉 I think it’s a Betty Crocker cookbook but I’d have to call my father-in-law to be sure.
DIY Whole Wheat Bread Ingredients
Servings: makes 2 loaves (original recipe makes four loaves)
- 1 Tbsp dry yeast (should be active, dry yeast)
- 1/4 cup warm water (for the yeast)
- 2 1/2 cups hot water
- 1 Tbsp salt
- 1/3 cup oil (we use olive oil exclusively)
- 1/3 cup sugar or honey (we always use honey)
- 6 cups whole wheat flour (we use a half and half mixture of hard red and hard white wheat, though you could add in a bit of ground oats or all-purpose flour near the end, if you like)
Equipment that Makes My Life Easier
There isn’t really too much you need besides two bread loaf pans and some measuring spoons. If you’re grinding your own wheat flour then you’ll obviously need something to make that happen with. Though many people recommend the Country Living Hand Grain Mill, I’ve used the Wonder Junior Deluxe Hand Grain Mill successfully for quite a while now; at about half the price it’s a good alternative if you’re not intended to grind wheat on a daily basis.
Granted, grinding flour by hand is a bit of a pain for sure. Besides, I can only sucker my kids into grinding wheat so often. They like bread but not THAT much. 🙂 Fortunately, we received a very early Christmas gift from my parents in the form of an Blendtec Electric Grain Mill which is turning out to be a real blessing and something I’ll have to review in the near future. Beyond that, a decent mixer is nice to have as well. We use a Bosch Compact Mixer which works out great for as often as we make bread.
DIY Whole Wheat Bread Directions
Follow along below the photos…


- Get the water temperature just right. For yeast to work properly (and also to not die) it needs a temperature of somewhere between 100-105 degrees Fahrenheit (or thereabouts). I usually shoot for just under 105 degrees Fahrenheit. Using a common digital thermometer ensure I get this just right.
- Prepare the yeast. Sprinkle one tablespoon of the active dry yeast into the 1/4 cup warm water. If I’m feeling impatient I tend to add about a teaspoon or so of sugar to the mixture to encourage the yeast to do it’s thing faster. You don’t have to but I did so for this batch.
- Begin mixing flour and hot water. Add about 3 1/2 cups of the wheat flour to the mixer. Then add 2 1/2 cups of hot water to it. Mix on slowest speed until it’s well blended.
- Add the salt, oil, and honey (or sugar) and blend again until well blended. I usually find that I need to stop the mixer and scrape the sides and bottom of the bowl to ensure there’s no dry flour that hasn’t been thorough mixed in.
- Add the prepared yeast mixture which may now look something like the photo above if you added the sugar to the mixture along with roughly another 1/2 cup of flour. Mix thoroughly on low setting. At the very least the yeast mixture should be bubbling on the surface. If not the yeast is likely bad OR you used too hot of water. Try again.
- Continue slowly adding flour. By now you will have used four cups of flour but may use up to six cups total. Continue adding flour 1/4 to 1/3 cup at a time and let it mix thoroughly each time, though, you may need to stop the mixer occasionally and scrape the bottoms and sides to ensure it’s all getting mixed in properly. In this photo the mixture is getting close to being done but it still sticks to the side more than it should so I continued to add more flour.
- This is more like what the bread mixture should look like. It’s sticking less and less to the sides and wanting to creep up the mixer attachment which is a good sign. I could have added just a bit more flour (maybe less than 1/4 cup) to try and get it to completely NOT stick to the sides but there’s a fine line, in my opinion, as to how much flour to add.
- Oil a cutting board and your hands, then remove the mixture from the mixing bowl and divide it in half. I tend to make one large blob on my cutting board and cut it in half with a large well-oiled knife but you don’t have to get that specific. Once split, place half the mixture into one oiled loaf pan and the other half in the second oiled loaf pan. You may want to push it into the corners, I typically do. You can also oil the tops of the loaves to get a softer crust. I usually do so but forgot with all the pictures I was taking!
- Cover the loaves with a damp cloth. Honestly, I have no idea why you’re supposed to do this other than the directions said so. Perhaps it has something to do with creating a nice environment for the yeast to continue to work but I really don’t know.
- The directions say to let rise approximately 1/3 in bulk for minimum 35 minutes (even hours). I prefer to let the bread rise until it’s at least doubled in bulk and almost to the top of the loaf pans (if not above) and “poking” at the damp cloth; this usually takes over an hour–even up to hours–but I’m sure it depends on your environment and time of the year as well.
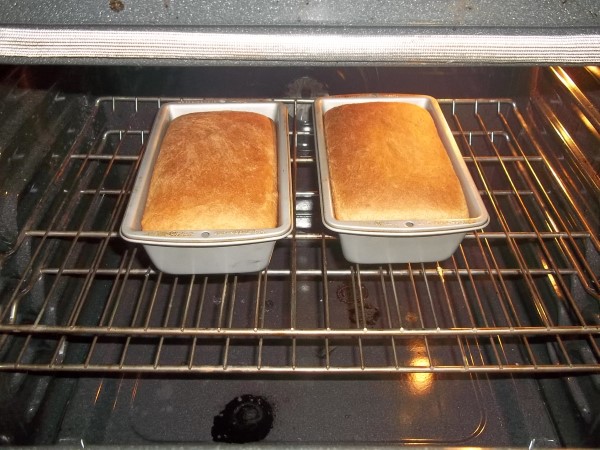
- Cook at 350 degrees Fahrenheit for 40-45 minutes. The directions say at higher altitudes you should bake first at 425 for 8 minutes then 350 for 40 minutes. I’ve never done that so I can’t say how well it works. I should also point out that when the bread has finished the allotted cooking time I like to turn off the oven and crack the door to let the bread very slowly cool down.
- About twenty minutes later I remove the bread from the loaf pans and let them completely cool (at least an hour) on a wire rack. Also be aware that if you start cutting into them too early they may tend to break apart.
That’s about it to making your very own DIY whole wheat bread. Store in a large Ziploc bag in the refrigerator for longevity and enjoy!
Leave a Reply